Newsletter Subscribe
Enter your email address below and subscribe to our newsletter


Raised Bed Gardening Made Simple
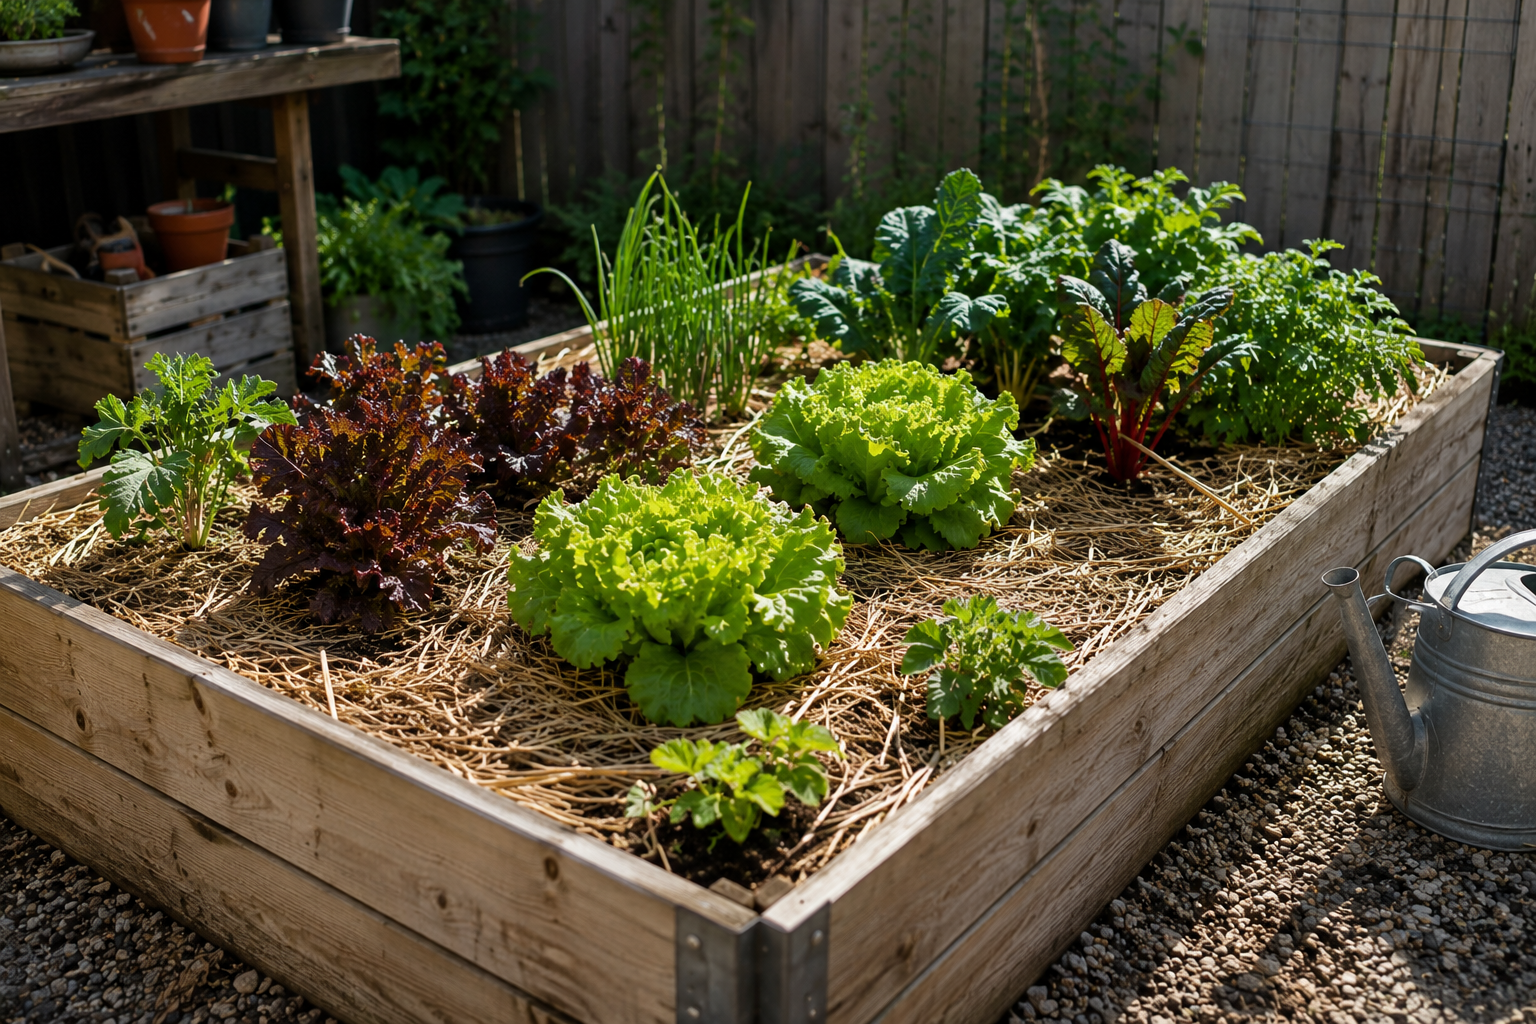
Mulching is one of the simplest ways to make a raised garden bed easier to maintain. A good layer of mulch protects exposed soil, slows moisture loss, reduces temperature fluctuations, and can gradually contribute organic matter as it breaks down.
However, adding mulch is not simply a matter of covering every visible patch of soil. Using the wrong material, applying too much, or piling mulch against plant stems can create unnecessary problems.
Learning how to mulch a raised garden bed properly can help you create a healthier and more manageable growing environment throughout the season.
For most vegetable raised beds, organic mulch is a practical choice because it gradually decomposes.
Common options include:
Each material behaves differently.
Straw is lightweight and works well around vegetables such as tomatoes, peppers, and cucumbers. Shredded leaves are inexpensive and useful in autumn or early spring. Grass clippings can provide a thin protective layer but should be used carefully.
Wood chips generally decompose more slowly, making them better suited to pathways or perennial beds than areas that are replanted frequently.
Choose a material based on what you grow and how often you expect to disturb the soil.
Do not immediately spread mulch over an untidy garden bed.
First, remove unwanted plants and any large pieces of dead vegetation. Check the soil surface and gently break up areas that have developed a hard crust.
If you plan to add compost or another soil amendment, do it before applying mulch.
Watering the bed before mulching can also be useful when the soil is particularly dry. Mulch is better at helping retain existing moisture than correcting severely dry soil underneath a thick layer.
Once the bed is prepared, you have a clean surface for an even application.
More mulch is not always better.
For many raised garden beds, approximately 2 to 3 inches of organic mulch is a practical starting point.
A very thin layer may not provide much protection, while an excessively thick layer can interfere with airflow and make it harder for water to reach the soil evenly.
The ideal depth also depends on the material.
Fine materials tend to form a denser layer, so they may need to be applied more lightly. Coarser materials contain more air spaces and can sometimes be used slightly deeper.
Check the mulch occasionally rather than assuming the original depth will remain unchanged all season.
One of the most common mulching mistakes is pushing material tightly against the base of vegetables.
Leave a small open space around stems.
Constant moisture trapped directly against plant tissue can create unfavorable conditions, particularly for young seedlings.
Tomatoes, peppers, herbs, and other transplanted vegetables should have enough open space around their stems for air circulation.
Think of mulch as a protective blanket for the soil, not something that needs to cover the plants themselves.
Mulching established plants is relatively straightforward, but direct-sown vegetables require more care.
Tiny seedlings may struggle to emerge through a thick layer of straw or leaves.
If you have recently planted carrots, radishes, lettuce, or other small seeds, leave the planting row lightly covered or uncovered until seedlings emerge.
Once the plants become established, mulch can gradually be moved closer to them.
This approach allows you to receive the benefits of mulch without blocking germination.
Mulch can serve different purposes depending on the time of year.
During warm weather, it can reduce rapid moisture loss from the soil surface and moderate extreme temperature changes.
In cooler periods, mulch may help protect the soil surface from heavy rain and erosion.
However, applying a heavy layer too early in spring can sometimes slow soil warming.
If you live in a cooler climate, allow the soil to warm sufficiently before applying a substantial mulch layer around warm-season vegetables.
Seasonal timing can be just as important as the material itself.
Fresh grass clippings are readily available for many gardeners, but they should not be dumped into a raised bed in thick piles.
Dense layers of fresh clippings can become compacted and unpleasant as they break down.
Instead, allow the clippings to dry slightly and apply them in thin layers.
Most importantly, avoid clippings from lawns recently treated with herbicides or other chemicals that you do not want introduced into a vegetable garden.
When you are unsure how a lawn has been treated, choose another mulch material.
Organic mulch does not last forever—and that is partly why it is useful.
Leaves, straw, and other plant-based materials gradually break down. As the layer becomes thinner, more soil will become exposed.
Check the bed periodically.
Instead of removing everything and starting again, you can usually add a fresh layer on top when needed.
If old mulch has become excessively compacted, loosen it gently before adding new material.
Mulch generally works best when it remains on the surface.
When preparing the bed for another planting, you may be tempted to dig all remaining mulch deeply into the soil.
That is not always necessary.
Coarse materials can take time to decompose, so move unfinished mulch aside when planting and return it afterward.
Materials that have already broken down into fine organic matter can be incorporated more easily.
Keeping mulch primarily on the surface also makes future planting areas easier to manage.
If your raised garden bed uses drip irrigation or a soaker hose, consider the order of installation.
In many cases, placing irrigation lines on the soil surface and then applying mulch around or over them works well.
This allows water to reach the soil underneath the protective layer.
Check the system periodically to make sure emitters are working properly. Because the irrigation lines may be partially hidden, leaks or blockages can otherwise be easy to overlook.
A few simple mistakes can reduce the effectiveness of mulch:
Avoiding these problems makes mulching much easier to manage.
Knowing how to mulch a raised garden bed properly comes down to choosing a suitable material and applying it in the right way.
Prepare the soil first, spread approximately 2 to 3 inches of organic mulch, keep material away from plant stems, and adjust the layer according to the season and the crops you are growing.
You do not need to make the bed perfectly covered at all times. Newly seeded areas may need to remain exposed temporarily, while established vegetables can benefit from a more complete mulch layer.
With regular inspection and occasional replenishment, mulch can become a simple part of your raised bed routine—helping protect the soil while making the garden easier to maintain throughout the growing season.